Unlocking Data Insights: Building a Unity Catalog Metastore in Databricks
Hands-On Guide: Practical Implementation of Databricks Unity Catalog


Introduction
In today's data-driven world, managing vast amounts of information efficiently is crucial for organizations to derive actionable insights. Databricks Unity Catalog offers a powerful solution by seamlessly integrating with various data sources and simplifying the data management process. In this blog post, we'll explore the steps to create a Databricks Unity Catalog, empowering you to harness the full potential of your data ecosystem.
Understanding Databricks Unity Catalog
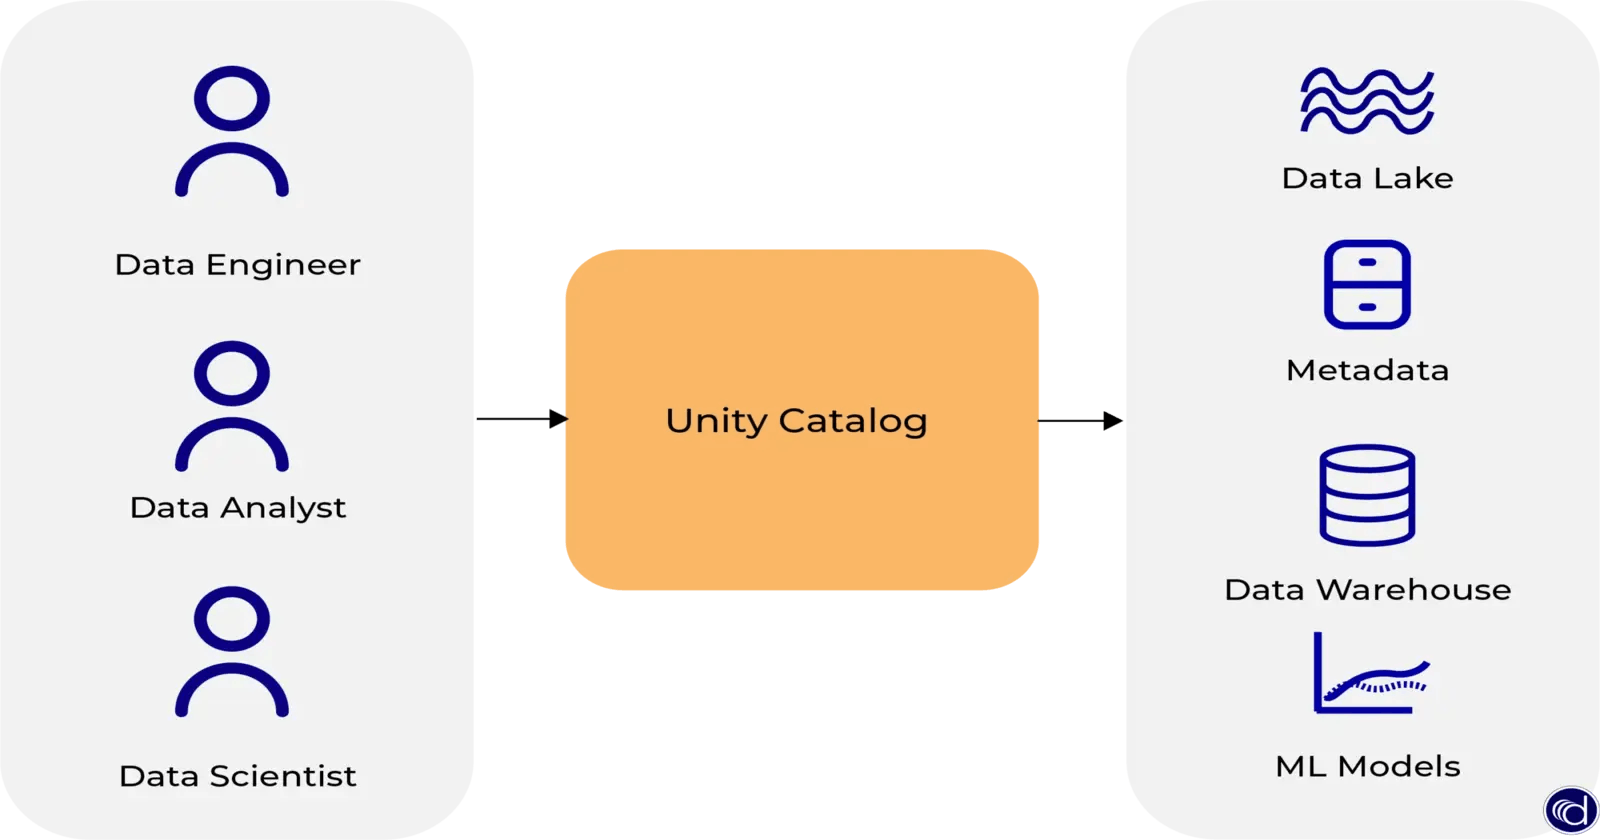
Before delving into the creation process, let's grasp the essence of Databricks Unity Catalog. Essentially, it serves as a unified metadata service that provides a consolidated view of diverse data assets across different platforms, such as data lakes, data warehouses, and databases. By centralizing metadata management, it enhances data discoverability, governance, and collaboration, thus facilitating informed decision-making.
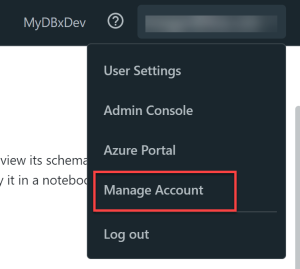
To manage your account, you can go to https://accounts.azuredatabricks.net/. If you log in with an AAD B2B user, you’ll need to open the account portal from within a workspace. To do this, go to your workspace and select your username in the top right of the page to open the menu. Then choose the Manage Account option in the menu. It will open a new browser window.
Requirements
To create a Unity Catalog metastore you’ll need:
A Databricks workspace configured to use the Premium pricing tier
A storage account with the hierarchical namespace enabled(ADLS Gen2).
Azure Active Directory Global Administrator privileges (at least temporarily, or borrow your AAD admin for 5 minutes during setup).
Contributor or Owner role in a resource group where you can create an Access Connector for Azure Databricks.
You should also confirm that you meet the following requirements for all setup steps:
You must be an Azure Databricks account admin.
The initial Azure Databricks account admin needs to be a Microsoft Azure Active Directory Global Administrator when they first log in. After the first login, they become the account admin and don't need the Global Administrator role anymore. They can then assign other users within the Azure Active Directory as additional account admins, who can further assign more admins without needing specific roles in Azure Active Directory.
If you want to set up metastore-level root storage, you must have permission to create the following in your Azure tenant:
A storage account to use with Azure Data Lake Storage Gen2.
A new resource to hold a system-assigned managed identity. This requires that you be a Contributor or Owner of a resource group in any subscription in the tenant.
Step 1: Create An Azure Databricks Workspace
The pricing tier is set on the basics page when creating the Databricks workspace.
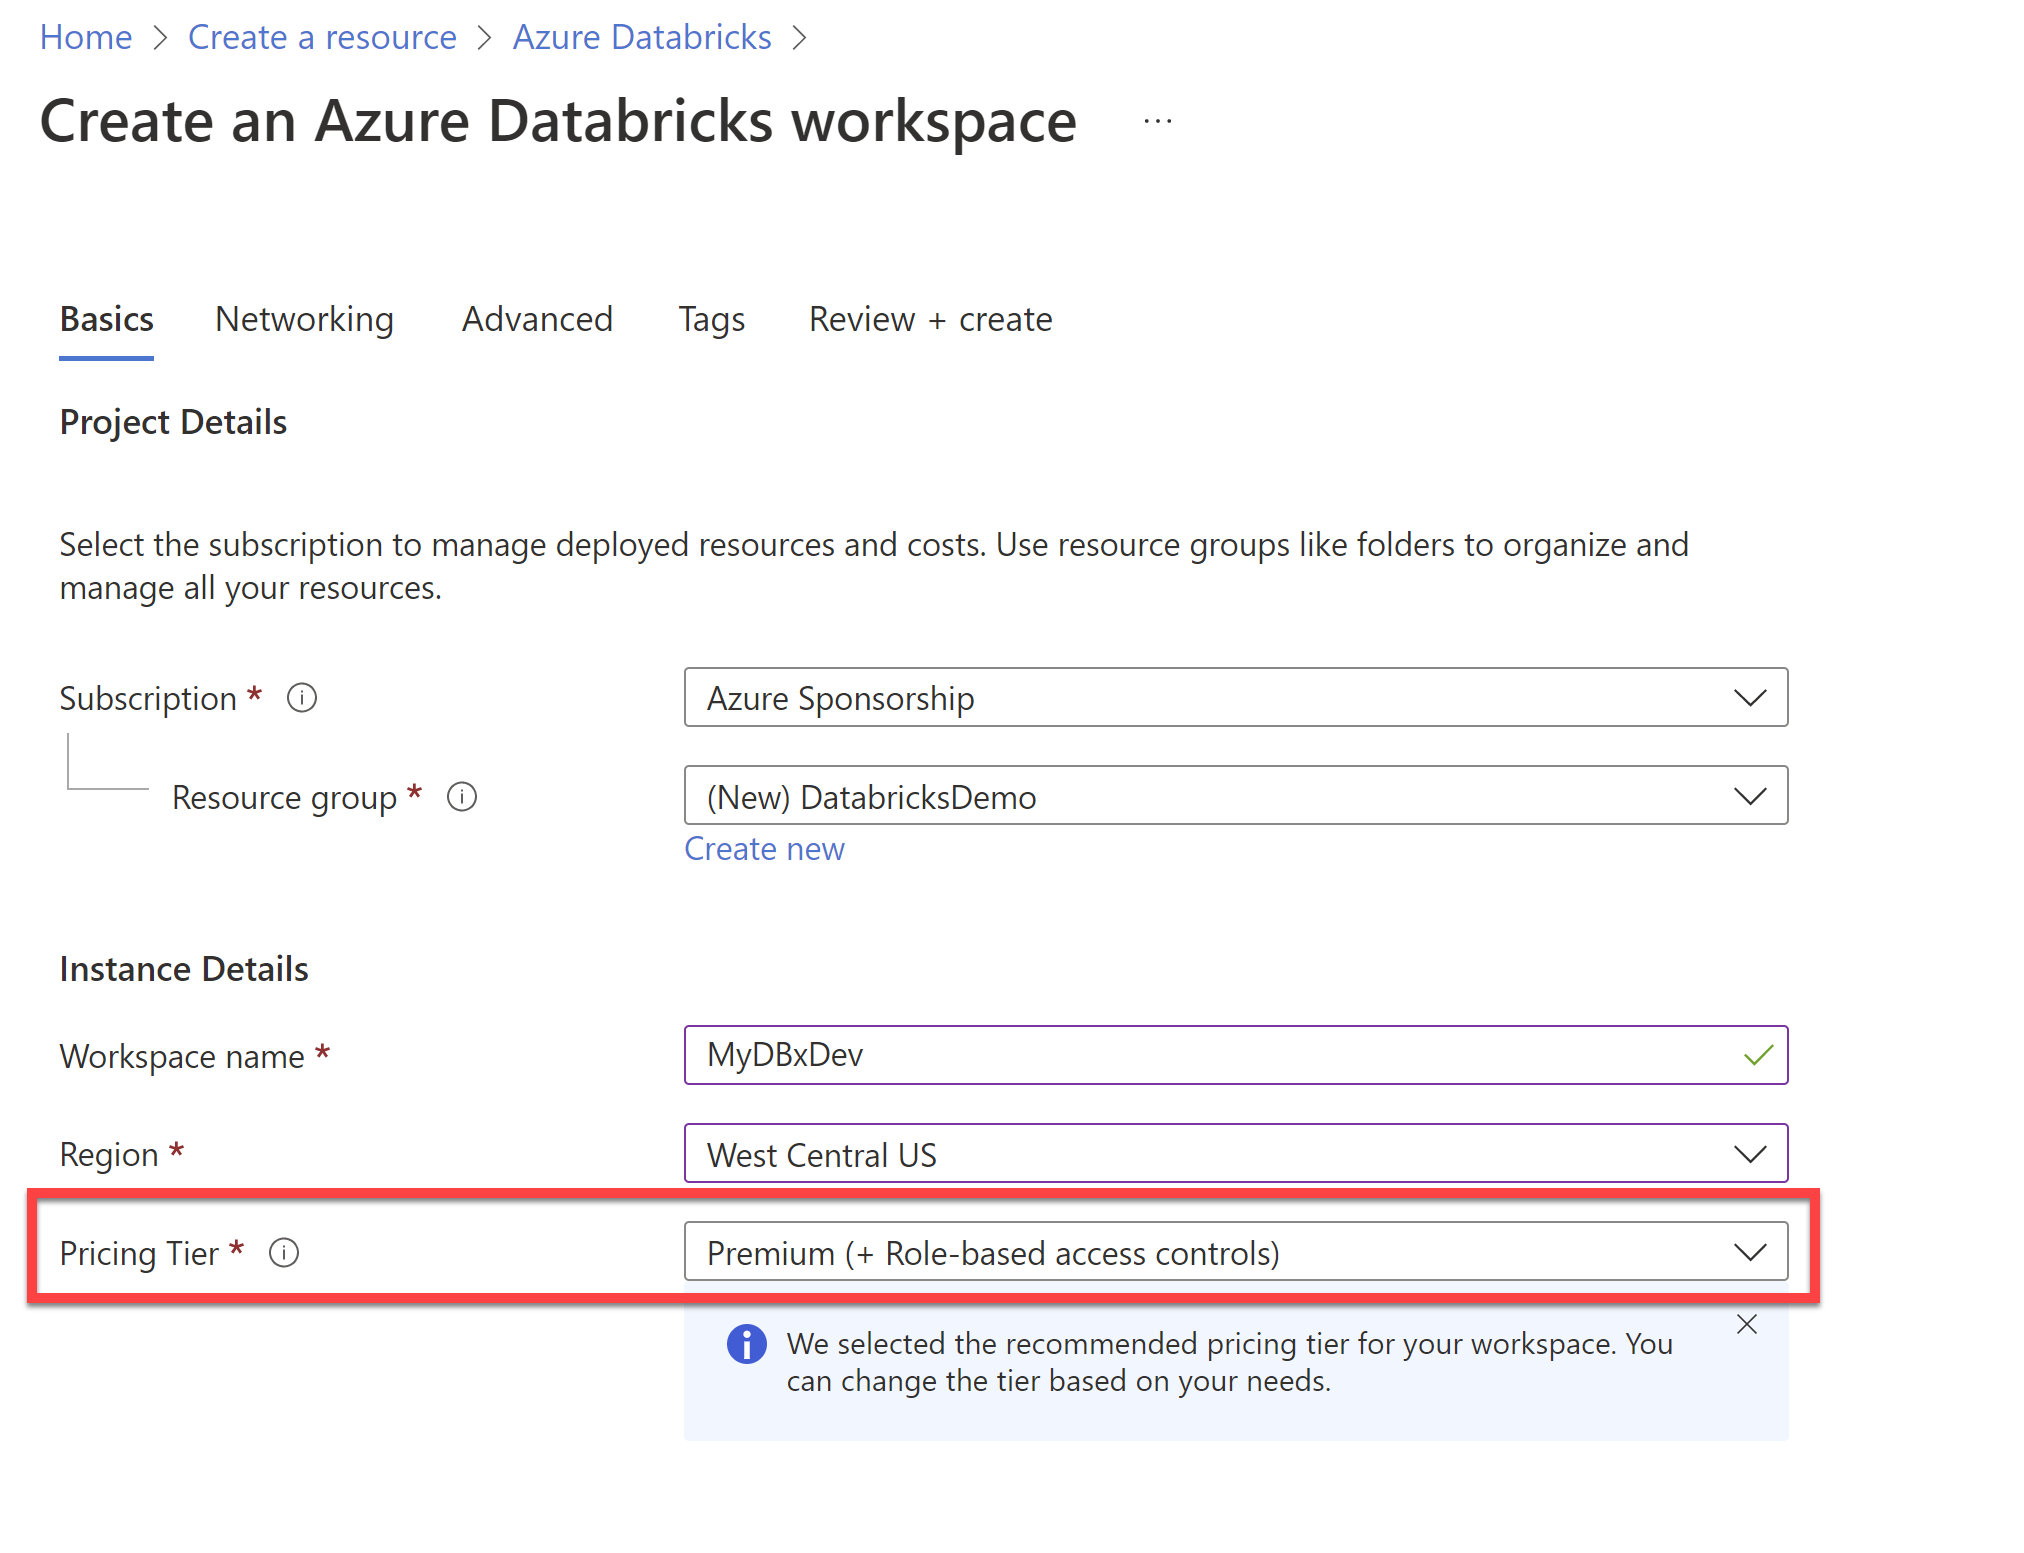
If you plan to use Unity Catalog, be sure to select the Premium pricing tier for your Databricks workspace
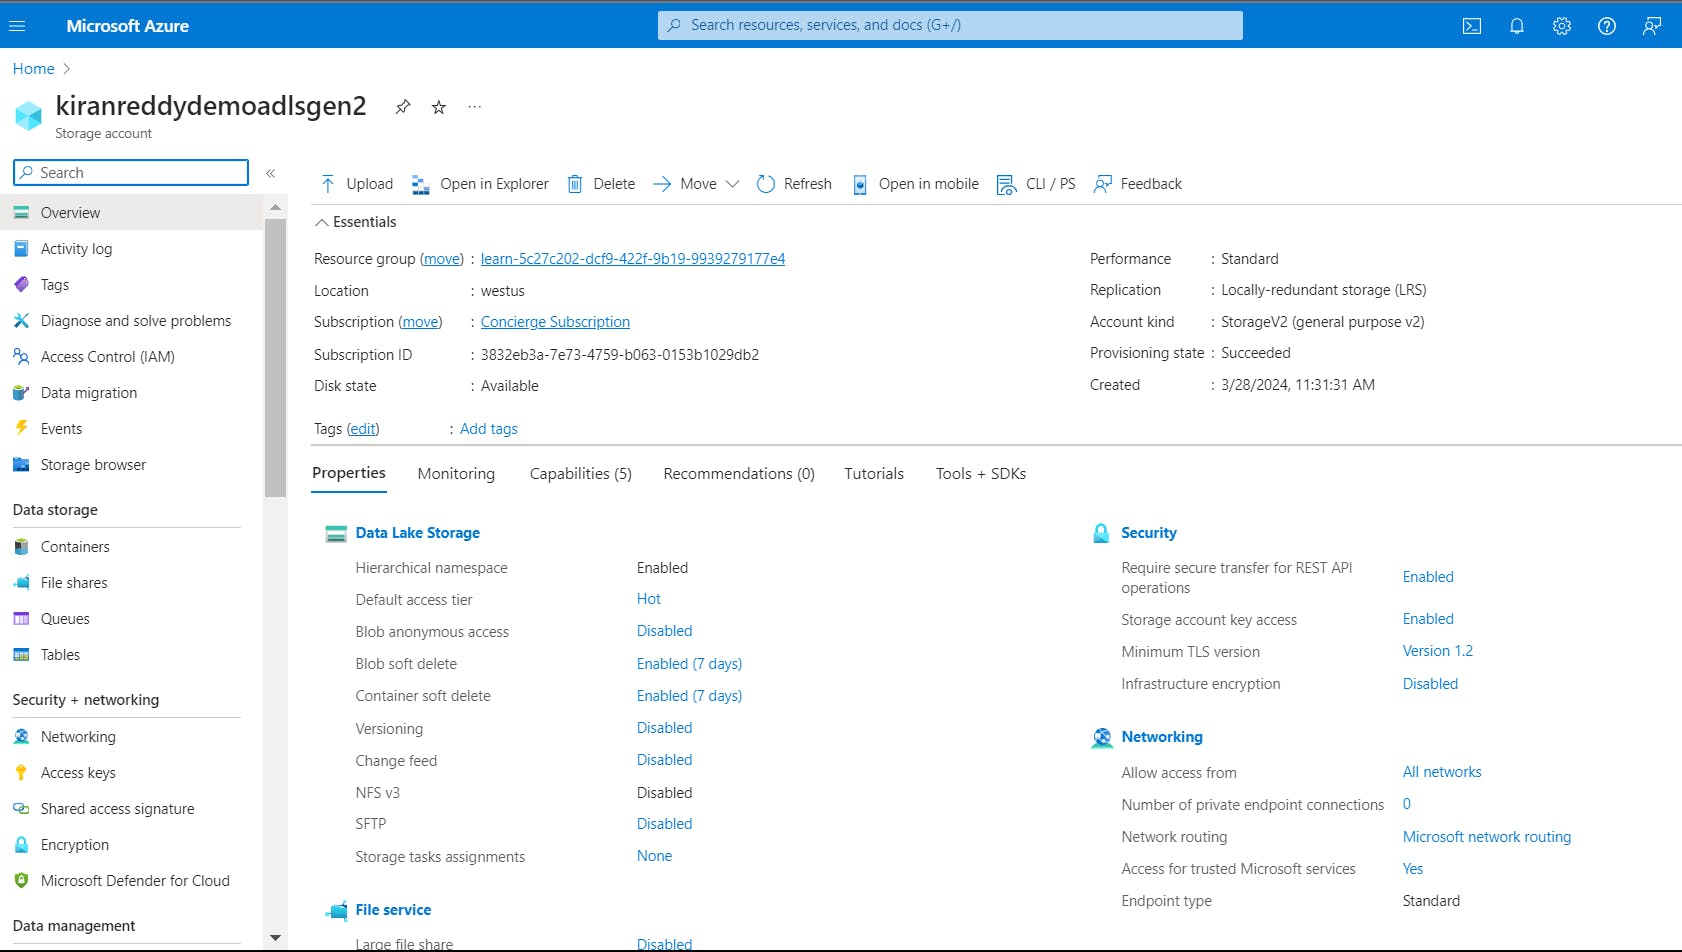
Step 2:Creating a Storage Account ADLS Gen2
Sign in to Azure Portal: Go to portal.azure.com and sign in with your Azure account credentials.
Navigate to Storage Accounts: Once logged in, click on the "Create a resource" button located on the upper left-hand corner of the Azure portal dashboard. Then, in the search bar, type "Storage account" and press Enter.
Select Storage Account: From the search results, select "Storage account" and click on the "Create" button to start the process of creating a new storage account.

Enter Basics Details: In the "Basics" tab of the creation wizard, fill in the necessary details:
Subscription: Choose the Azure subscription you want to use for the storage account.
Resource group: Create a new resource group or select an existing one.
Storage account name: Enter a unique name for your storage account. The name must be unique across Azure.
Location: Choose the geographic location where you want to deploy your storage account.
Configure Networking: In the "Networking" tab, choose the connectivity method for accessing the storage account. You can select options such as allowing access from all networks (public endpoint), only selected networks (private endpoint), or specific virtual networks.
Advanced Settings (Optional): You can configure advanced settings like 'Hierarchical Namespace' and Data Lake Storage Gen2 storage account settings in the "Advanced" tab if required.

Review + Create: After configuring all the settings, review the details provided for the Data Lake Storage Gen2 account. Ensure that everything is set up as per your requirements.
Once you've reviewed the settings and confirmed they are correct, click on the "Create" button. Azure will now begin provisioning the Data Lake Storage Gen2 account based on your specifications.
Step 3: Create an access connector for Azure Databricks
The Access Connector for Azure Databricks is a first-party Azure resource that lets you connect managed identities to an Azure Databricks account.
Use a system-assigned managed identity
Log in to the Azure Portal as a Contributor or Owner of a resource group.
Click + Create or Create a new resource.
Search for Access Connector for Azure Databricks and select it.
Click Create.
On the Basics tab, accept, select, or enter values for the following fields:
Subscription: This is the Azure subscription that the access connector will be created in. The default is the Azure subscription you are currently using. It can be any subscription in the tenant.
Resource group: This is the Azure resource group that the access connector will be created in.
Name: Enter a name that indicates the purpose of the connector.
Region: This should be the same region as the storage account that you will connect to.
Click Review + create.
When you see the Validation Passed message, click Create.
When the deployment succeeds, the access connector is deployed with a system-assigned managed identity.
When the deployment is complete, click Go to resource.
Make a note of the Resource ID.
The resource ID is in the format:
/subscriptions/12f34567-8ace-9c10-111c-aea8eba12345c/resourceGroups/<resource-group>/providers/Microsoft.Databricks/accessConnectors/<connector-name>
Grant access to the storage account for the managed identity.
To grant the permissions in this step, you must have the Owner or User Access Administrator Azure RBAC role on your storage account.
Log in to your Azure Data Lake Storage Gen2 account.
Go to Access Control (IAM), click + Add, and select Add role assignment.
Select the Storage Blob Data Contributor role and click Next.
Under Assign access to, select Managed identity.
Click +Select Members, and select either Access connector for Azure Databricks or User-assigned managed identity.
Search for your connector name or user-assigned identity, select it, and click Review and Assign.
The access connector will show up as a separate resource in the Azure Portal.

You don’t grant storage account access to end users – you’ll grant user access to data via Unity Catalog. The access connector allows the workspace to access the data in the storage account on behalf of Unity Catalog users. This is why you must assign the Storage Blob Data Contributor to the access connector.
Once you have been assigned the account admin role in Databricks, you will see the button to create a metastore in the account console.
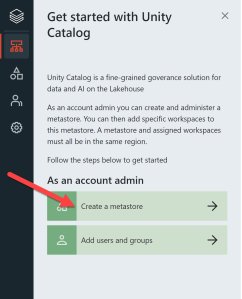
The Create a meatastore button is only available for Databricks account admins
create a Metastore
If you chose to create metastore-level storage, make sure that you have the path to the storage container and the resource ID of the Azure Databricks access connector that you created in the previous task.
Log in to your workspace as an account admin.
Click your username in the top bar of the Azure Databricks workspace and select Manage Account.
Log in to the Azure Databricks account console.
Click Catalog.
Click Create Metastore.
Enter the following:
Name for the metastore.
Region where the metastore will be deployed.
This must be in the same region as the workspaces you want to use to access the data. If you chose to create a storage container for metastore-level storage, that region must also be the same.
(Optional) ADLS Gen 2 path: Enter the path to the storage container that you will use as root storage for the metastore.
The
abfss://prefix is added automatically.(Optional) Access Connector ID: Enter the Azure Databricks access connector’s resource ID in the format:
Copy
Click Create.
When prompted, select workspaces to link to the metastore.
Creating metastore-level storage in Azure Databricks allows you to store metadata associated with your Databricks workspaces separately from the default location
One or multiple Metastores ?
Think of a metastore as a central hub for managing data and permissions in Azure Databricks. The Azure documentation suggests having just one of these hubs per region, rather than creating multiple ones. Why? Because having a single hub makes it easier to manage and organize your data across different environments, business units, and teams.
Imagine if you had multiple hubs scattered around - it would be like having multiple control centers for your data, each with its own set of rules and permissions. This could quickly become confusing and hard to manage, especially as your data ecosystem grows.
By centralizing everything in one place, you keep things simple and streamlined. Within this single hub, you can organize your data neatly into different catalogs and schemas, making it easy to navigate and control who has access to what.
conclusion
In conclusion, Azure Databricks Unity Catalog revolutionizes data management by providing a unified metadata solution. With streamlined data discovery, enhanced governance, and collaborative capabilities, it's a game-changer for organizations. By following best practices like creating a single centralized metastore, businesses can harness the full potential of their data ecosystem and drive innovation.
Stay tuned
Stay tuned for our upcoming articles as we dive deeper into essential topics like storage credentials and external locations within Unity Catalog. These insights will further enrich your understanding of data management strategies, empowering you to leverage Unity Catalog's full potential